Roof Structure Explained: What Every Homeowner Should Know
Roof Structure Explained: What Every Homeowner Should Know
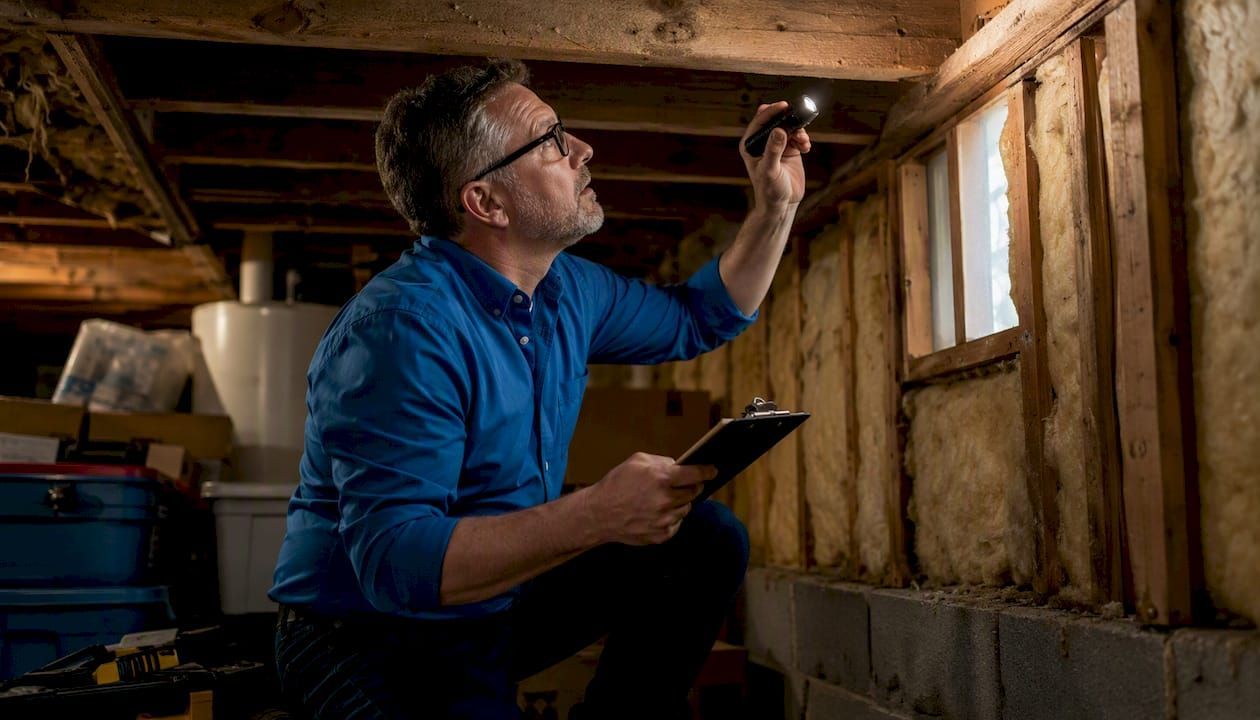
A roof structure is the load-bearing assembly of framing members and layered materials that transfers every weather, live, and dead load down to your walls and foundation. Think of it as the skeleton and skin of your home's top surface working together. When one layer fails, the others compensate until they can't.
Here's what the full assembly includes:
- Primary framing: rafters, trusses, or joists that carry structural loads
- Roof deck (sheathing): plywood or OSB panels that form the nailing surface and add lateral rigidity
- Underlayment and vapor control: felt, synthetic sheet, or self-adhering ice-and-water shield
- Insulation and ventilation zone: thermal control and moisture management
- Finish covering: shingles, metal panels, tile, or membrane
- Flashing: metal or rubberized details at every penetration and transition
- Gutters and drainage: channels that carry water away from eaves and foundation
Understanding these layers matters whether you're planning a reroof, scheduling an inspection, or comparing contractor bids. A contractor who can't explain the assembly clearly is a red flag worth noting before you sign anything.
What does a roof structure look like from the inside out?
A roofing system is more than the visible surface; it's a layered assembly where each component has a specific job, and a failure in one layer often triggers problems in the next. Walking through the sequence from interior to exterior helps you connect visible symptoms to hidden causes.
- Interior ceiling and attic space: The finished ceiling below the framing. Staining here is usually the first visible sign of a leak above.
- Structural framing (rafters, trusses, joists): The load-carrying skeleton. Sagging or rot here is a structural emergency, not a cosmetic issue.
- Roof deck (sheathing): Plywood or OSB panels fastened to the framing. The deck provides the nailing surface for every layer above and gives the roof lateral rigidity.
- Underlayment and vapor control: A secondary water barrier between the deck and the finish material. Self-adhering ice-and-water shield goes at the most vulnerable spots.
- Insulation and ventilation zone: Manages heat and moisture. In a vented attic, this zone sits between the ceiling joists and the deck. In a compact unvented assembly, insulation is placed directly above the deck.
- Finish covering: The weather surface — shingles, metal, tile, or membrane. This is what most people picture when they say "roof."
- Flashing: Metal or rubberized pieces at chimneys, valleys, skylights, and wall intersections. Flashing is where most leaks actually start.
- Gutters and downspouts: Collect runoff from the eaves and direct it away from the foundation.
One important distinction: on a pitched roof, the finish covering sheds water by gravity, so underlayment is a backup. On a low-slope or flat roof, the membrane is the primary weather barrier, and every seam and penetration detail carries much more responsibility. The glossary near the end of this article defines each component by name if you need a quick reference while talking to a contractor.
How do rafters, trusses, and joists differ?
The framing is the part of the assembly most homeowners never see, yet it determines everything from attic storage space to whether your roof can handle a heavier covering material. These three members each play a different role.
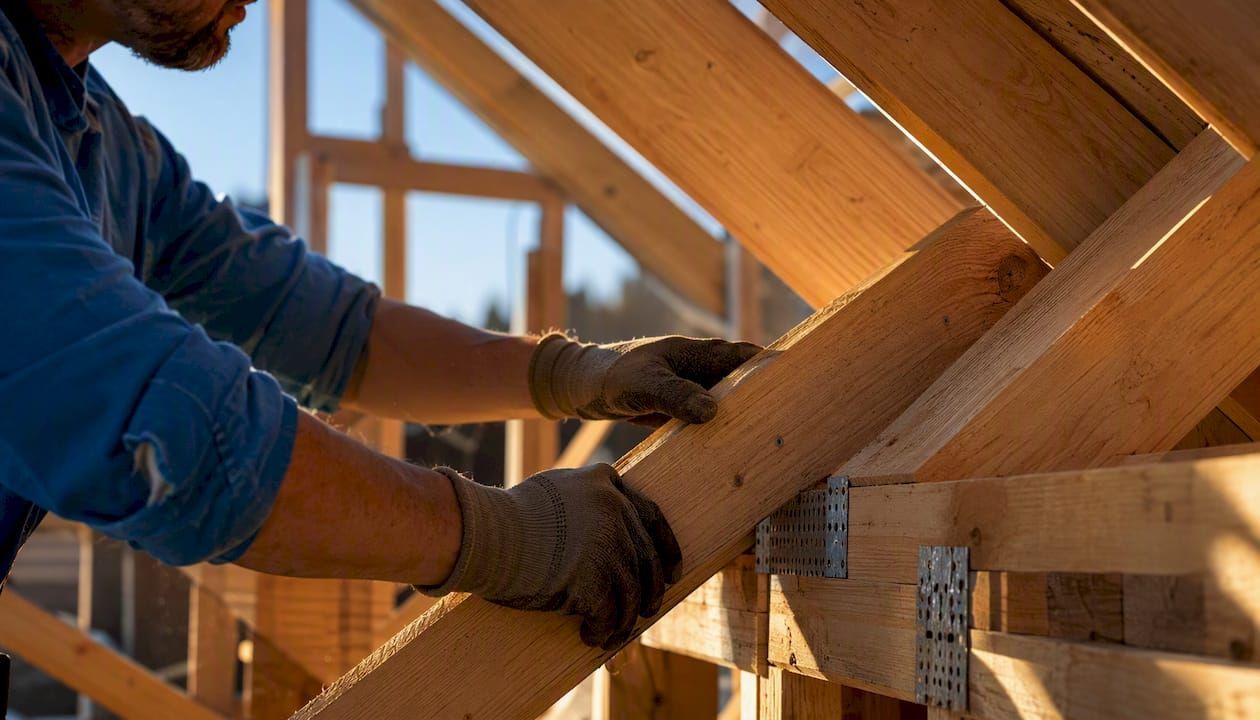
Rafters are individual boards (typically dimensional lumber like 2×8 or 2×10) cut and installed one at a time on site. They run from the wall plate up to the ridge board, forming the sloped sides of the roof. Because each rafter is cut to fit, site-built (stick-framed) roofs can handle complex shapes, dormers, and vaulted ceilings that prefabricated trusses simply can't accommodate.
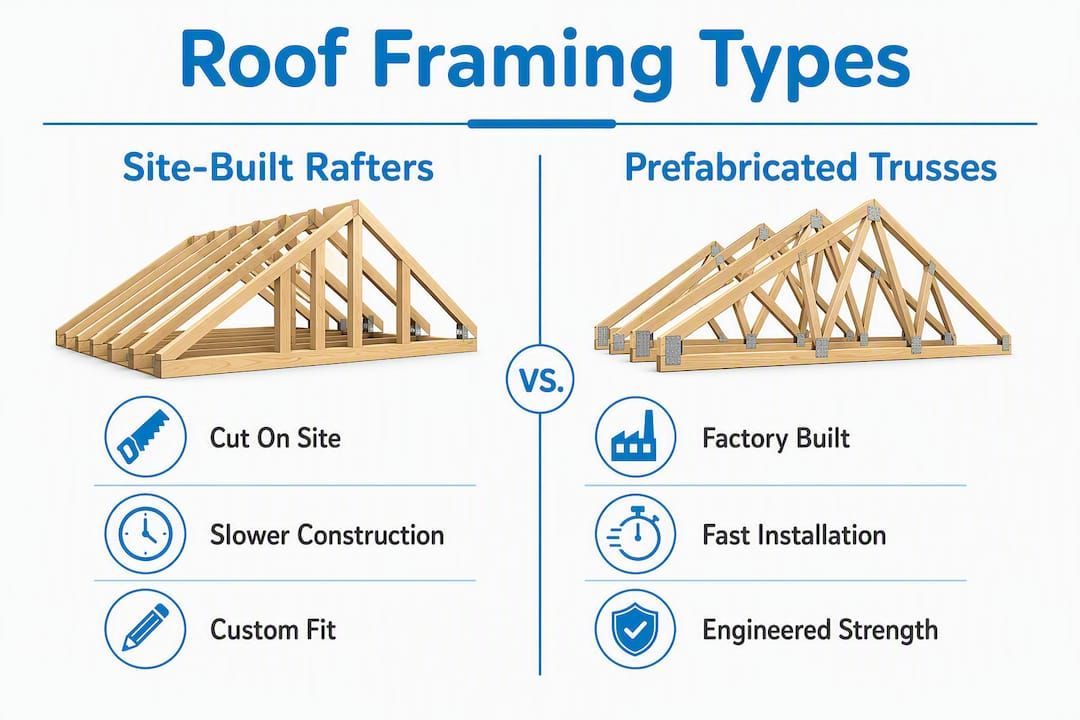
Prefabricated trusses are engineered wood assemblies built in a factory and delivered to the job site. They span the full width of the building using a triangulated web of smaller members connected by metal connector plates. Trusses are cost- and time-efficient for standard residential plans, but when a roof has complex lines, open vaulted interiors, or nonstandard spans, site-built rafters allow the architecture to succeed where plated trusses cannot.
Ceiling joists run horizontally between the wall plates, tying the tops of opposite walls together and carrying the ceiling load below. In a truss system, the bottom chord of the truss does this job. In a stick-framed roof, separate ceiling joists resist the outward thrust that rafters generate.
| Feature | Site-Built Rafters | Prefabricated Trusses |
|---|---|---|
| Construction speed | Slower (cut on site) | Faster (factory-built, crane-set) |
| Cost | Higher labor cost | Lower overall cost for standard plans |
| Attic access | Full open attic possible | Web members restrict usable space |
| Vaulted ceilings | Yes, with proper design | Generally not without custom engineering |
| Complex rooflines | Handles well | Limited by standard geometry |
| Span capability | Good with proper sizing | Excellent for long spans |
| Engineer required | For complex designs | Trusses are pre-engineered by manufacturer |
Pro Tip: When you're in the attic, look for metal connector plates (the toothed steel plates pressed into the wood at joints). If you see them, you have trusses. If the members run continuously from wall plate to ridge without web bracing, you have site-built rafters. Photograph the plate connections and any visible member labels before calling a contractor — that information helps them quote accurately without a separate site visit.
What are your decking and underlayment options?
The deck and underlayment are the two layers that sit directly under your finish material. Getting them right during a reroof is one of the highest-value decisions you'll make.
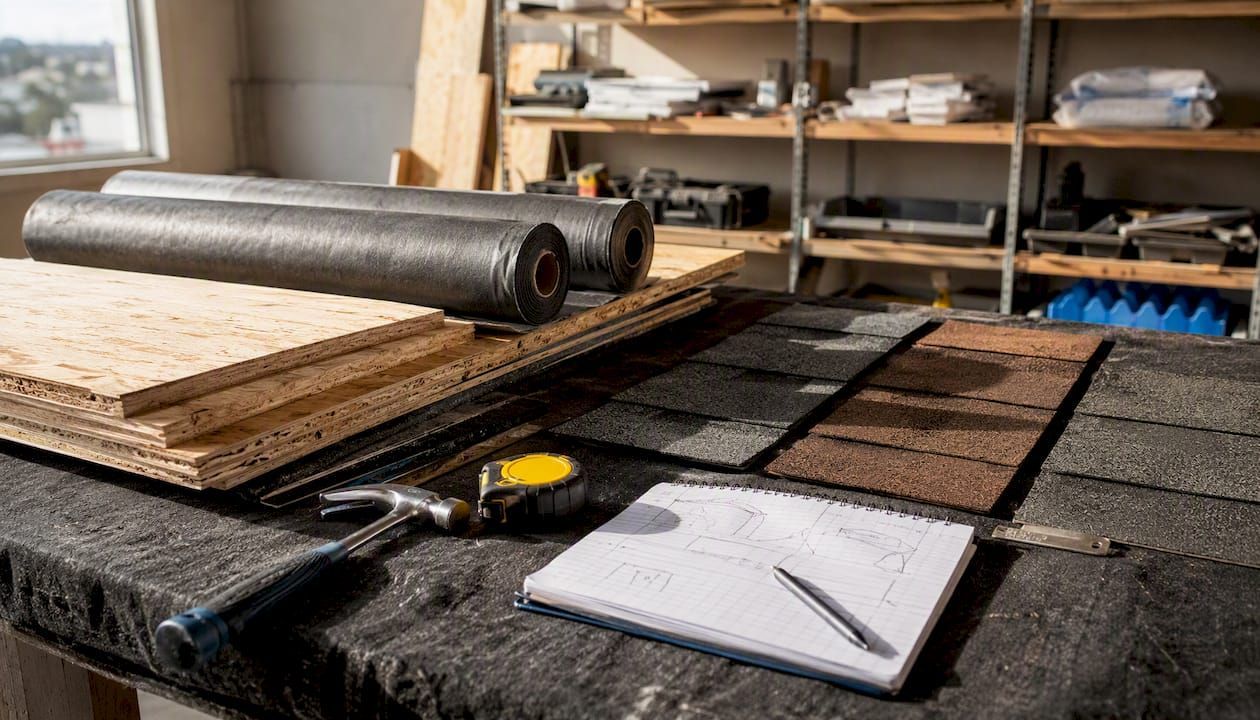
Decking (sheathing) materials and thicknesses
Most residential roofs use either plywood or oriented strand board (OSB). Both are code-acceptable, but they behave differently when wet. Plywood tends to hold its shape better after repeated moisture cycles; OSB can swell at the edges if water infiltrates. For Northern California's climate, either works well when properly installed and covered promptly.
| Decking material | Typical thickness | Common rafter/truss spacing | Fastening notes |
|---|---|---|---|
| OSB (Exposure 1) | 1/2 in. | 24 in. on center | 8d ring-shank nails, 6 in. edge / 12 in. field |
| Plywood (CDX, 3-ply) | 3/8 in. | 24 in. on center | 8d common nails, 6 in. edge / 12 in. field |
| Plywood (CDX, 4-ply) | 1/2 in. | 24 in. on center | 8d common nails, 6 in. edge / 12 in. field |
| Plywood (CDX, 5-ply) | 5/8 in. | 24 in. on center | 8d common nails, 6 in. edge / 12 in. field |
Fastening patterns above reflect common IRC-aligned residential practice; always confirm with local code and manufacturer installation instructions.
Best practices during installation or reroof:
- Stagger panel joints so no four corners meet at one point
- Leave a 1/8 in. gap between panels to allow for expansion
- Replace any deck section that feels soft underfoot or shows delamination
- Inspect for rust-stained nail heads, which signal moisture has been sitting on the deck
Underlayment types and where each belongs
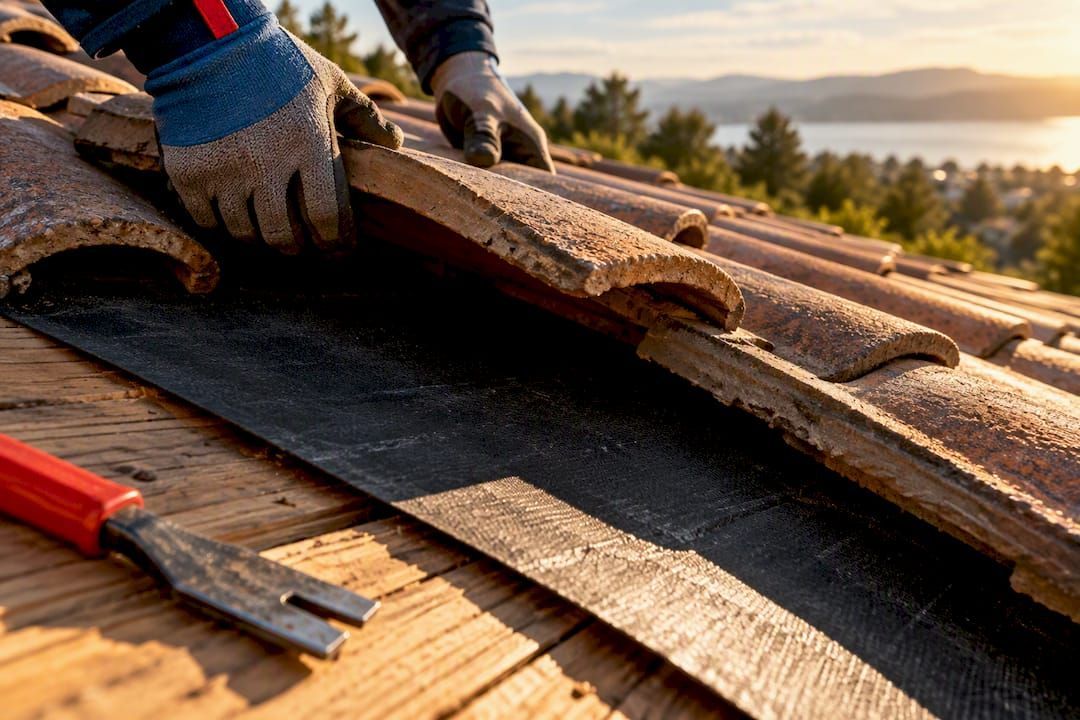
Underlayment is the roof's secondary water barrier; it protects the deck if water gets under the finish material. Three types cover most residential applications:
- #15 or #30 felt: Traditional asphalt-saturated felt. Economical and widely used under asphalt shingles. Heavier felt (#30) is more tear-resistant during installation.
- Synthetic underlayment: Woven or spun polypropylene. Lighter, stronger, and more UV-resistant than felt. Most manufacturers now require it for warranty compliance on premium shingle lines.
- Self-adhering ice-and-water shield: A rubberized asphalt membrane that bonds to the deck and self-seals around fasteners. Required by the IRC at eaves (typically the first 24 in. inside the exterior wall line in cold climates), valleys, and around all penetrations. In Northern California, check your local amendment to the IRC for the exact eave coverage requirement.
Pro Tip: If your contractor's bid doesn't specify underlayment type and brand, ask. "Standard underlayment" is not a specification. Manufacturer warranties on premium shingles often require a specific synthetic underlayment — using felt instead can void the shingle warranty entirely.
How does your choice of roof covering affect the structure?
Slope is the first filter that determines which covering families will work on your roof; weight is the second filter that determines whether your existing framing can handle the switch. Heavy coverings like concrete tile may require reinforcing the frame before installation.
| Covering type | Minimum slope | Typical weight (per 100 sq ft) | Typical lifespan | Structural note |
|---|---|---|---|---|
| Asphalt shingles (3-tab) | 2:12 | 230 lbs | 20 years | Standard framing handles this |
| Architectural shingles | 2:12 | 430 lbs | 30 years | Standard framing handles this |
| Metal panels (standing seam) | 1:12 (low-slope) | 50 lbs | 40 years | Lightest option; no reinforcement needed |
| Concrete tile | 3:12 | 900 lbs | 50 years | Often requires framing upgrade |
| Clay tile | 3:12 | 600 lbs | 75–100+ years | Structural review recommended |
| Slate (natural) | 4:12 | 900 lbs | 75 years | Structural engineer review required |
| Single-ply membrane (TPO/EPDM) | Flat to 2:12 | 10–30 lbs | 20 years | Low-slope only; minimal structural impact |
Weight ranges are approximate industry figures. Confirm exact product weights with manufacturer data sheets before specifying.
Pro Tip: Before switching from asphalt shingles to tile or slate, pull the attic hatch and look at your rafter or truss size and spacing. If you see 2×6 rafters at 24 in. on center, that's a common residential configuration built for shingles. Adding 900 lbs per 100 sq ft of concrete tile without a structural review is a risk no reputable contractor should take without engineering sign-off.
Note that heavier coverings also change flashing requirements. Tile and slate use mortar-set or mechanically fastened flashing details that differ significantly from the step-flashing used with shingles. Your contractor's flashing plan should change when the covering changes.
For metal roofing on commercial buildings, the structural calculus shifts again: metal panels are among the lightest coverings available, but their attachment hardware and thermal movement details require specific fastening patterns that differ from residential applications.
What framing does each roof shape require?
Roof geometry determines where loads concentrate, where water collects, and where flashing is most critical. Each shape has its own structural logic.
Gable roof: Two sloping planes meeting at a central ridge. The simplest framing pattern: common rafters run perpendicular to the ridge, ceiling joists tie the walls. Gable-end walls need lateral bracing, especially in high-wind zones. The rake edges at each end are vulnerable to wind uplift.
Hip roof: All four sides slope to the eaves. Hip rafters run diagonally from each corner to the ridge, with jack rafters filling in between. More complex to frame than a gable, but the hip geometry is inherently more wind-resistant because there are no exposed gable ends.
Gambrel roof: Two slopes on each side, the lower slope steeper than the upper. Common on barns and colonial-style homes. The knee wall where the two slopes meet is a critical load point and needs proper bearing and bracing.
Shed (mono-pitch) roof: A single sloping plane. Simple framing, but the high wall carries significant lateral load from wind. Common on additions and modern-style homes.
Butterfly roof: Two inward-sloping planes meeting at a central valley. Dramatic appearance, but the valley is the primary drainage point — a single clogged drain can cause ponding and structural damage. Requires careful waterproofing and a reliable internal drain system.
Saltbox roof: An asymmetrical gable where one slope extends much lower than the other, often covering an addition. The long slope creates a long rafter run that needs proper sizing and mid-span support.
Key framing and flashing implications by shape:
- Valleys (gable, saltbox, complex hips) concentrate water flow and require continuous ice-and-water shield plus metal valley flashing
- Hip corners need metal hip caps and careful step-flashing at any wall intersections
- Dormers introduce four new valleys and a wall-to-roof transition, each requiring its own flashing detail
- Low-slope butterfly and shed roofs need positive drainage slope (minimum 1/4 in. per foot toward drains) to prevent ponding
Pitch affects material selection directly. Slopes below 2:12 require a membrane system. Slopes between 2:12 and 4:12 allow certain low-slope shingles and metal panels with modified installation. Above 4:12, the full range of steep-slope materials applies.
Stick framing vs. trusses vs. engineered systems: which is right for your project?
Choosing a framing method is one of the first decisions a contractor makes, and it affects cost, schedule, and what your attic can be used for. Here's how the three main approaches compare.
Stick (site-built) framing uses dimensional lumber cut and assembled on site. It's the right choice for complex rooflines, dormers, vaulted ceilings, and any situation where standard truss geometry won't fit the architecture. The trade-off is labor time and cost.
Prefabricated metal-plated trusses are engineered in a factory, delivered on a flatbed, and set by crane in a fraction of the time it takes to stick-frame. For a standard rectangular home, trusses typically cost less overall and install faster. The web members that make trusses structurally efficient also fill the attic space, limiting storage and HVAC access.
Engineered timber and steel solutions (glulam beams, LVL ridges, steel moment frames) come into play for long spans, heavy loads, or architecturally exposed structures. In timber truss projects, connection details — plates, fasteners, and bearing conditions — usually drive complexity and cost more than the size of the members themselves, so careful joint design and specifying appropriate hardware reduces field problems.
Pros and cons at a glance:
- Stick framing pros: Maximum design flexibility, full attic access, handles complex geometry
- Stick framing cons: Higher labor cost, longer schedule, quality depends on framer skill
- Truss pros: Factory-engineered, faster installation, consistent quality, cost-effective for standard plans
- Truss cons: Limited attic use, can't easily accommodate vaulted ceilings, requires crane access
- Engineered/steel pros: Long spans, exposed-beam aesthetics, high load capacity
- Engineered/steel cons: Highest cost, longest lead time, requires licensed engineer on every project
Questions to ask any contractor before signing:
- What design loads are you using, and do they match local code (IRC and ASCE 7)?
- How are the rafters or trusses braced against lateral and uplift loads?
- What is the ventilation plan for the attic or roof assembly?
- Will you provide stamped engineered drawings for the framing?
- What is the truss lead time, and who is the manufacturer?
- What warranty covers the framing members and connections?
Bring in a structural engineer when you're switching to a significantly heavier covering, spanning more than 30 feet without intermediate support, dealing with a complex roofline, or when a contractor can't answer questions 1 through 4 above.
What structural forces act on your roof, and how do you protect against them?
Every roof carries four types of load simultaneously, and understanding how they travel through the structure helps you recognize when something is wrong.
Dead load is the permanent weight of the roofing materials themselves — shingles, deck, framing. Live load is temporary weight: workers, equipment, or accumulated debris. Snow load varies by region; in Northern California's Sierra foothills and mountain communities, it can be the governing design load. Wind uplift acts like suction on the roof surface, trying to peel the covering and framing away from the walls.
The core principle of roof framing: If the ridge can't drop, the walls can't spread. Preventing ridge drop is the single most effective way to stop the chain reaction of outward wall thrust that causes structural failure in residential roofs. Loads should be considered in the projected plan view for accurate rafter sizing — slope alone doesn't reduce the structural load on members.
Load path in a typical residential roof runs like this: finish covering → deck → rafters or trusses → wall plates → stud walls → foundation. Every connection in that chain matters. A rafter that isn't properly toe-nailed to the plate, or a truss that lacks hurricane ties, is a weak link that wind or snow can exploit.
For large flat commercial buildings, a steel roof deck supported by open-web steel joists is the predominant system for strength, fire resistance, and economy — a very different structural logic from residential stick framing, but the same load-path principle applies.
Key structural protection measures:
- Structural ridge beam: Replaces the traditional ridge board with an engineered beam that carries rafter loads vertically rather than relying on ceiling joists to resist thrust
- Collar ties and rafter ties: Horizontal members connecting opposing rafters to resist spread
- Hurricane ties and rafter clips: Metal connectors (Simpson Strong-Tie H2.5A and similar) that anchor rafters or trusses to the wall plate against uplift
- Diagonal bracing: Prevents racking in the plane of the roof deck
- Purlin bracing: Supports rafters at mid-span to reduce effective span and deflection
Before hiring an engineer or contractor for a structural project, collect: current photos of the attic framing from multiple angles, any existing drawings or permits, measurements of rafter/truss spacing and member size, and the address so they can pull local snow/wind zone data.
How do ventilation, flashing, and gutters protect your roof's structure?
Ventilation, flashing, and drainage aren't glamorous, but they're where most roofs fail. Get these three right and the structure underneath stays dry and stable for decades.
Ventilation strategies
A properly vented attic moves air continuously from the soffits (intake) to the ridge (exhaust), keeping the deck cool in summer and preventing condensation in winter. Common approaches:
- Soffit-to-ridge (continuous): The most effective system. Soffit vents at the eaves draw cool air in; a continuous ridge vent exhausts warm, moist air at the peak. Works with the stack effect and wind pressure simultaneously.
- Gable vents: Installed in the gable-end walls. Less effective than soffit-to-ridge because they don't ventilate the full deck area, but common in older homes.
- Powered attic ventilators: Fans that actively exhaust attic air. Can depressurize the attic and draw conditioned air from the living space if not carefully balanced with intake area.
- Compact (unvented) assemblies: Modern residential trends include more compact unventilated roof assemblies, particularly in conversions, requiring precise vapor control because insulation sits directly against the roof deck. These work well when designed correctly but have zero margin for vapor control errors.
Critical flashing locations
Flashing failures are a leading cause of roof leaks, and they're often invisible until water has already damaged the structure below. Watch these spots:
- Chimney base and step flashing along the chimney sides
- Valleys where two roof planes meet
- Skylights and solar panel penetrations
- Plumbing vent boots and HVAC curbs
- Wall-to-roof intersections (kick-out flashing is especially important here)
- Eave drip edge, which directs water into the gutter rather than behind the fascia
Gutters, downspouts, and drainage
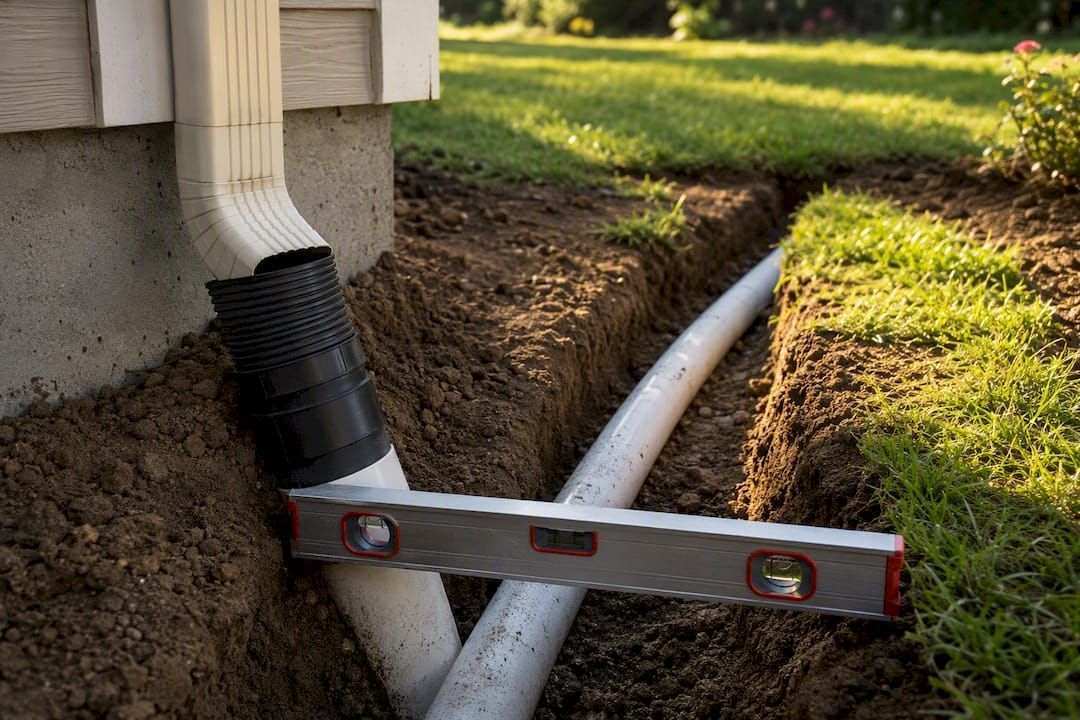
Gutters collect runoff from the eaves and channel it to downspouts that discharge away from the foundation. A clogged gutter backs water up under the eave, soaking the fascia, soffit, and eventually the deck. On low-slope roofs, inadequate drainage creates ponding, which accelerates membrane deterioration and adds structural load. A well-designed commercial gutter system routes water predictably and protects the building envelope at every level.
For low-slope roofs, internal drains with overflow scuppers are standard. The overflow scupper is a life-safety detail: if the primary drain clogs, the scupper prevents water from accumulating to the point of structural overload.
What should you inspect, and when should you call a pro?
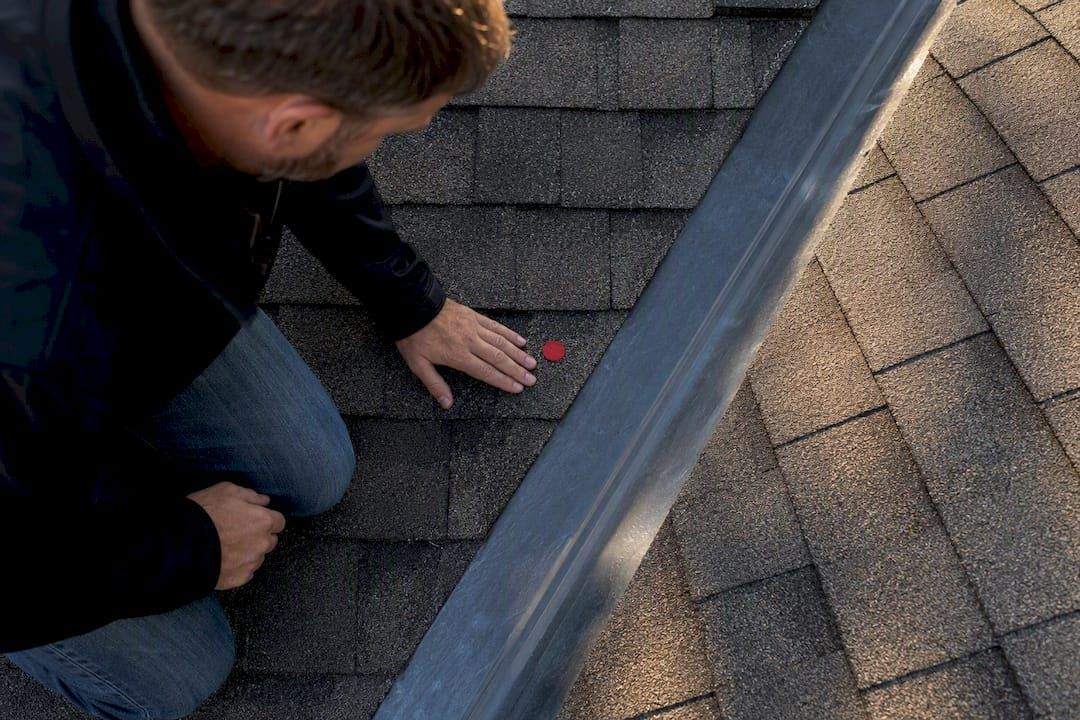
A twice-a-year inspection — once in spring after winter storms, once in fall before the rainy season — catches most problems before they become expensive. Here's what to look for.
Homeowner inspection checklist:
- Sagging ridge line or uneven roof plane (visible from the street)
- Soft spots or spongy feel when walking the roof (deck delamination or rot)
- Missing, curling, or cracked shingles
- Rusted or missing flashing at chimneys, valleys, and penetrations
- Granule loss in gutters (sign of shingle aging)
- Water staining on interior ceilings or attic rafters
- Attic condensation, mold, or daylight visible through the deck
- Gutters pulling away from the fascia or overflowing during rain
What to photograph for a contractor:
- The ridge line from both ends of the house
- Any visible sag or deflection in the roof plane
- Flashing at the chimney and any skylights (close-up)
- Interior attic shots showing rafter/truss condition and any staining
- Gutter attachment and any fascia rot
Quick DIY vs. call a pro:
- DIY: Clearing gutters, replacing a single cracked shingle, resealing a small pipe boot with roofing caulk
- Call a pro: Any framing rot or structural sag, repeated leaks in the same location, flashing that has separated from the wall, water staining that reappears after a repair
Red flags in contractor proposals:
- No mention of structural drawings or load calculations for a complex reroof
- Vague language like "replace as needed" with no specified materials or fastening pattern
- A bid significantly lower than others with no explanation of what's excluded
- No mention of underlayment type, ice-and-water shield locations, or ventilation plan
Pro Tip: Ask every contractor: "Will you provide a written scope that specifies decking material, underlayment brand and type, ice-and-water shield locations, and fastening pattern?" A contractor who hesitates at that question is telling you something important.
Roof structure glossary: terms you'll hear from contractors
Use this as a quick reference when reviewing bids or walking through an attic with a contractor.
- Rafter: A sloped framing member running from the wall plate to the ridge, carrying roof loads. See the framing section for identification tips.
- Common rafter: A standard rafter perpendicular to the ridge, the most frequently used type in gable roofs.
- Hip rafter: A rafter running diagonally from a corner of the building to the ridge end, forming the hip line.
- Valley rafter: A rafter running diagonally inward where two roof planes meet, forming a valley.
- Ridge board: A horizontal board at the peak of the roof that rafters bear against. Not a structural beam in most stick-framed roofs.
- Structural ridge: An engineered beam at the ridge that carries rafter loads vertically, eliminating outward thrust on the walls.
- Truss: A prefabricated, engineered framing assembly using triangulated members and metal connector plates. See the framing comparison table.
- Collar tie: A horizontal member connecting opposing rafters near the upper third of the roof, resisting spread under load.
- Ceiling joist: A horizontal framing member tying opposite wall plates and carrying the ceiling below.
- Purlin: A horizontal member running parallel to the ridge, supporting rafters at mid-span to reduce their effective span.
- Roof deck (sheathing): Plywood or OSB panels fastened to the framing, providing the nailing surface and lateral rigidity.
- Underlayment: A secondary water barrier installed over the deck, under the finish covering.
- Ice-and-water shield: A self-adhering rubberized membrane used at eaves, valleys, and penetrations for waterproof protection.
- Flashing: Metal or rubberized material installed at transitions and penetrations to direct water away from joints.
- Eave: The lower edge of the roof that overhangs the wall.
- Soffit: The underside of the eave overhang, often containing ventilation inlets.
- Fascia: The vertical board at the eave edge, to which gutters are attached.
- Gutter: A trough at the eave that collects and channels roof runoff.
- Vapor retarder: A material that limits moisture diffusion through the assembly, critical in compact unvented roof designs.
Key Takeaways
A roof structure's long-term performance depends on matching the right framing method, covering weight, and ventilation strategy to your specific building and climate.
| Point | Details |
|---|---|
| Framing type shapes your options | Trusses save cost on standard plans; site-built rafters are required for vaulted ceilings and complex rooflines. |
| Covering weight drives structural decisions | Heavy materials like concrete tile or slate require a structural review before reroofing over standard residential framing. |
| Flashing and ventilation prevent most failures | The majority of roof leaks trace back to failed flashing or inadequate ventilation, not the finish covering itself. |
| Inspection twice a year catches problems early | Check the ridge line, attic framing, flashing, and gutters each spring and fall before damage compounds. |
| Shieldguardroofing for NorCal inspections | Shieldguardroofing's team brings 75+ years of combined experience to residential and commercial roof inspections across Northern California. |
What experienced roofers actually worry about
Most homeowners focus on shingles. Most roofing failures start somewhere else entirely.
After seeing hundreds of roofs across Northern California, the pattern is consistent: the finish covering is rarely where the real problem lives. It's the flashing that was installed without kick-out at the wall intersection, the ridge that was never properly tied, the attic that was insulated without leaving a ventilation channel at the eaves. These are the details that don't show up in a low-bid proposal and don't become visible until water has been working on the structure for a year or two.
The other thing worth saying plainly: a roof structure is not a place to value-engineer. The framing, the connections, the hurricane ties — these are what keep the building envelope intact during a wind event or a heavy snow load. Skipping a structural ridge beam to save a few hundred dollars, or omitting rafter ties because "we've always done it this way," creates liability that falls on the homeowner when the insurance adjuster shows up.
What actually matters in a roof project is documentation, material specification, and connection hardware. A contractor who hands you a written scope with fastening patterns, underlayment brand, and ice-and-water shield locations is a contractor who has done this before and expects to stand behind the work. That's the standard worth holding every bid to.
Shieldguardroofing: professional roof inspections and replacement in Northern California
When you've read enough to know what questions to ask, the next step is getting eyes on your actual roof by someone who can answer them.
Shieldguardroofing is a family-owned roofing company with over 75 years of combined experience serving homeowners and businesses across Northern California. The team handles residential roof replacement and structural repair from initial inspection through final installation, using premium materials from GAF, GAF Energy, and Brava Roofing that carry industry-leading warranties. For property owners dealing with commercial structures, commercial roofing services cover everything from low-slope membrane systems to structural deck assessments.
Every project starts with a thorough inspection that documents framing condition, deck integrity, flashing details, and ventilation — the same checklist this article walks you through. Financing options are available for larger replacement projects. Request your inspection or quote directly at shieldguardroofing.com/residential-roofing and get a written scope before any work begins.
Authoritative sources and further reading
These resources back the technical claims in this article and are worth bookmarking for deeper research or contractor conversations.
- Roof-Framing Design — Fine Homebuilding — Practical framing guidance covering ridge-drop prevention, projected plan view load calculations, and rafter sizing principles.
- Pro Guide to Roof Framing — The Home Depot — Accessible overview of framing types, rafter vs. truss decisions, and basic framing sequence for residential projects.
- Types of Roofing Materials: Guide by Slope and Form — Organizes covering families by slope requirement and weight, with structural implications for each.
- Domestic Roof Construction — Wikipedia : Reference overview of residential timber roof framing types, shapes, and covering materials in cold and temperate climates.
Recommended