Homeowners: 3 Contractor Tested Rules for a Lasting Downspout to Drain
Homeowners: 3 Contractor Tested Rules for a Lasting Downspout to Drain
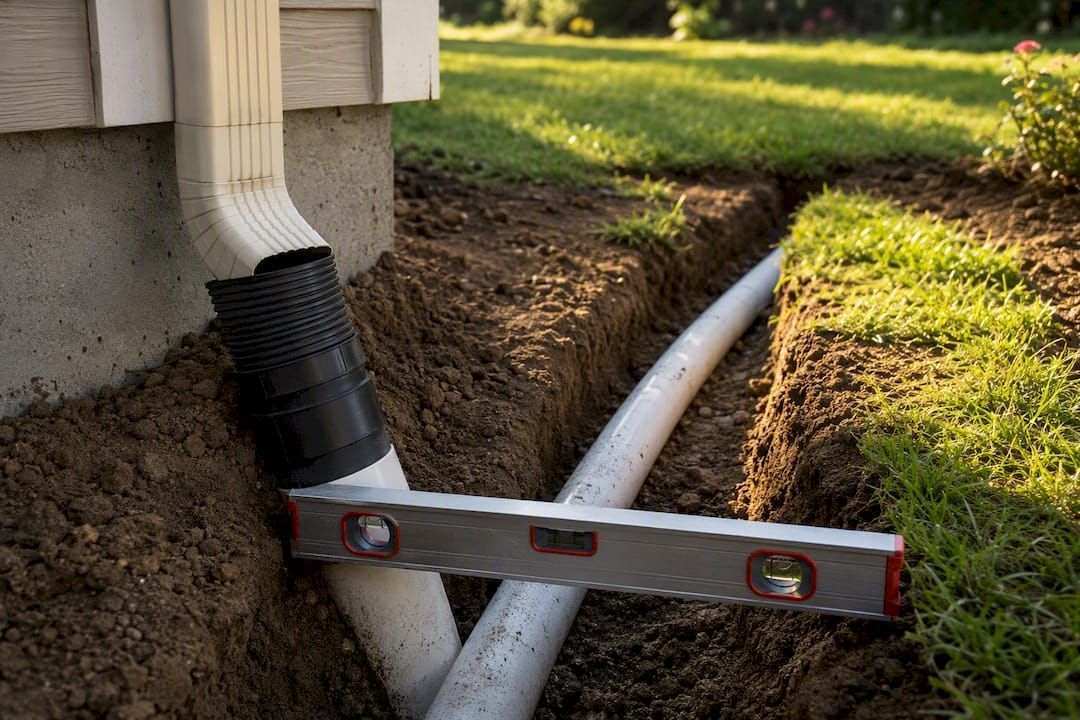
The right downspout to drain connection uses a properly sized adapter fitted into solid, smooth-wall 3 or 4 inch pipe, pitched continuously downhill to a safe discharge point. Get those three things right and the system needs almost no attention for years. Get any one of them wrong and you're looking at bellied pipe, backed-up water, or a soggy foundation. Most homeowners can handle a straightforward single-downspout run; anything with multiple downspouts, tight grading, or a driveway crossing deserves a second look from a contractor.
TL;DR:
- Properly sized and fitted adapters should connect the downspout to a continuous downhill trench free of dips or low spots for decades of reliable drainage.
- Four-inch solid PVC pipe is ideal for most residential drainage, while three-inch pipes are suitable only for short, single-spout runs, with larger sizes reducing clog risks.
- Maintain a minimum slope of 1/8 inch per foot, with 1/4 inch per foot preferred, and ensure the trench is properly bedded, layered, and leveled to avoid low spots.
- Discharge points should be at least five feet from the foundation for surface outlets or ten feet for underground pipes to prevent water damage or flooding.
- Professional installation includes grade assessment, utility locates, permanent fittings, and quality workmanship warranties, reducing the risk of common failures like leaks or back-ups.
How Do You Connect a Downspout to a Drain Pipe?
Connecting a downspout to an underground drain pipe follows the same sequence whether you're routing one spout thirty feet to daylight or tying four spouts into a shared main line. Skip a step and you'll be digging it back up within a season.
Here's the process in order:
- Mark the path and call for utility locates. Walk the yard and flag where the pipe needs to travel, then have your local utility marking service flag buried lines before anything gets dug up.
- Measure the downspout outlet. Most residential downspouts are 2x3 inches or 3x4 inches. Note the exact dimensions before you shop for an adapter.
- Choose the adapter style and pipe size. Match the adapter to your downspout shape and pick 3 or 4 inch pipe based on how much roof area feeds that line.
- Dig the trench with a continuous downhill slope. No flat stretches, no dips. Every foot of trench should drop slightly toward the outlet.
- Bed the pipe on compacted, debris-free soil. A soft or uneven trench bottom is how pipes settle and develop low spots later.
- Use sweep elbows instead of sharp 90-degree bends. Sweeps let debris and water keep moving; hard right angles are where clogs start.
- Attach the adapter to the downspout. For metal downspouts, crimp the adapter collar or screw it into place. For newer synthetic materials, check the manufacturer's fastening method.
- Join the pipe sections. Solvent-weld PVC joints for permanent buried runs, or use clamped, removable fittings if you want a serviceable cleanout near the house.
- Backfill in layers, tamping as you go. Avoid dumping one big pile of loose dirt on top of the pipe.
- Test with a hose before you call it done. Run water through the full length and watch for pooling, backflow at the adapter, or slow drainage anywhere along the route.
Pro Tip: Run the hose test for a full five minutes, not thirty seconds. Slow leaks and marginal slope problems often don't show up until the pipe has been running steadily for a while.
Most installation failures trace back to two spots: an adapter that doesn't actually fit the downspout, and a trench that looks sloped to the eye but has a hidden low spot in the middle. A four-foot level or a string line with a bubble level catches what your eye will miss every time.
What Types of Downspout Adapters Should You Use?
Picking the wrong adapter is the single most common reason a downspout to drain connection leaks or pulls loose within the first year. Adapters generally come in three styles: offset, centered, and universal flexible.
- Offset adapters shift the pipe connection away from the wall, which matters when the downspout sits tight against the foundation and you need clearance to work a fitting in without hitting siding or a foundation ledge.
- Centered (flush) adapters connect straight down in line with the downspout, the simplest option when there's already room to work and no wall obstruction.
- Universal flexible sleeves stretch or compress to bridge mismatched shapes, useful when you're connecting an odd-sized older downspout to standard modern pipe, or when alignment isn't perfect and you need a little forgiveness in the joint.
Rigid PVC hub adapters are the better long-term choice for anything you plan to solvent-weld and bury permanently. Retail listings show plenty of universal adapters on the market, but a hub adapter that glues into your pipe run outperforms a snap-fit universal piece once it's underground and under seasonal freeze-thaw stress. Flexible sleeves are handy for above-ground transitions or temporary setups, not for the buried section of the line.
Before buying anything, measure twice: get the exact outlet dimensions off the downspout itself, and confirm the inside diameter of the pipe you're connecting to. Manufacturer pages for drainage fittings list adapter options by both downspout size and body style, which makes it easier to match parts correctly instead of guessing at the hardware store.
Which Pipe Size and Material Work Best?
Four-inch smooth-wall pipe is the right default for most residential downspout drains. Three-inch pipe is a practical minimum reserved for short runs feeding a single downspout with limited roof area. Step up to 4 inch anywhere you're combining flow from more than one spout, and you'll cut your clog risk substantially compared to staying at 3 inch.
Material matters just as much as diameter. Solid, non-perforated pipe is what roof runoff needs — perforated pipe is built for French drains, where the goal is to let water seep out along the length of the pipe into surrounding soil. Roof water is the opposite case. You want it carried away and discharged at a defined point, not dispersed into the soil next to your foundation.
A few material and schedule notes worth knowing before you buy:
- Schedule 40 PVC is the standard choice for most residential runs and handles typical burial depths without issue.
- SDR pipe (a thinner-wall PVC rated by dimension ratio) works for straightforward lawn runs but isn't the right call under load-bearing areas.
- Under driveways or parking areas , step up to a thicker-walled pipe rated for vehicle loads, or run it deeper with proper bedding to distribute the weight.
- Corrugated pipe costs less and flexes easily around obstacles, but the ridged interior catches sediment and debris that smooth-wall pipe just carries through.
If your line only carries one modest roof section a short distance to daylight, 3 inch solid PVC is fine. Anything more ambitious, go with 4 inch smooth-wall from the start. Repiping a clogged corrugated run two years later costs a lot more than buying the right pipe once.
What Slope and Trench Depth Do You Need?
Slope is what separates a drain that works for decades from one that fails within a year. The minimum is 1/8 inch of drop per foot of pipe, roughly a 1% grade, but 1/4 inch per foot is the preferred target where your yard's elevation allows it. That steeper pitch moves water and sediment through the line faster and gives you a margin of error if the trench settles slightly over time.
Continuous slope matters more than the exact number. A pipe with one section pitched steeply and another section nearly flat will develop a belly at the transition, and that low spot collects standing water, sediment, and eventually roots or debris that clog the line entirely.
Typical cover depth runs 8 to 12 inches under open lawn areas, enough to keep the pipe below regular foot traffic and shallow yard work without digging more than you need to. Under a driveway or any area that sees vehicle weight, go deeper and use pipe rated for that load.
- Bed the trench bottom on compacted, rock-free soil before laying pipe.
- Backfill in layers and tamp each one, rather than filling the trench in a single pass.
- Check for low spots with a level as you go, not just after the trench is dug.
- Keep the discharge point clear of the foundation.
Pro Tip: Discharge points need to sit a minimum distance from the foundation to effectively prevent water damage, with surface systems typically requiring a safe clearance and underground piping even farther away, according to Building America guidance.. Skimping on that distance is one of the fastest ways to turn a dry basement into a wet one. Skimping on that distance is one of the fastest ways to turn a dry basement into a wet one.
Frost depth varies by region, and in colder climates a pipe with weak slope is far more likely to hold standing water that freezes and cracks a joint. Continuous fall toward the outlet is your best defense against that, more reliable than burying the pipe deeper alone.
Daylight, Pop-Up Emitter, or Dry Well: Which Discharge Works Best?
Where the water actually exits the system matters as much as how it gets there. Three options cover most residential situations, and your lot's slope usually decides which one makes sense.
- Daylight discharge routes the pipe to an open-air exit point downhill from the house, the simplest and most reliable option when your property has enough natural slope to support it. Protect the outlet with a splash pad or a small rock apron so the concentrated water flow doesn't erode a channel into the lawn.
- Pop-up emitters work for flatter lots where a true daylight exit isn't available. A spring-loaded cap sits flush with the grass and pops open under water pressure, then closes again once flow stops. They're convenient, but the moving parts can freeze shut in cold climates or clog with grass clippings and dirt if nobody checks them.
- Dry wells hold water underground and let it percolate into surrounding soil, useful where there's no viable surface discharge point at all. They depend entirely on soil percolation rate. Clay-heavy soil that doesn't drain well will cause a dry well to back up, and sizing one correctly usually calls for an actual percolation test rather than a guess.
For most yards with even a modest grade, daylight discharge beats the alternatives on cost and reliability. Save pop-up emitters and dry wells for the flat-lot situations where daylight genuinely isn't an option.
What Are the Most Common Installation Mistakes?
Most downspout drainage failures come down to the same handful of errors, and every one of them is fixable once you know what to look for.
- No slope or a hidden belly in the line. Regrade the trench and relay the pipe with a consistent pitch rather than patching just the low section.
- Shallow burial. Pipe sitting just under the surface gets crushed by foot traffic or frost heave. Dig it out and re-bury to the proper cover depth.
- Corrugated pipe clogging with sediment. Replace the corrugated section with smooth-wall solid pipe; it's a permanent fix, not a temporary patch.
- Wrong adapter fit leaking at the downspout. Swap in an adapter sized to your actual downspout dimensions instead of forcing a close-enough fit.
- T-fittings on multi-downspout lines causing turbulence and buildup. Use WYE fittings instead, which angle incoming flow into the main line and keep sediment moving rather than settling at the junction.
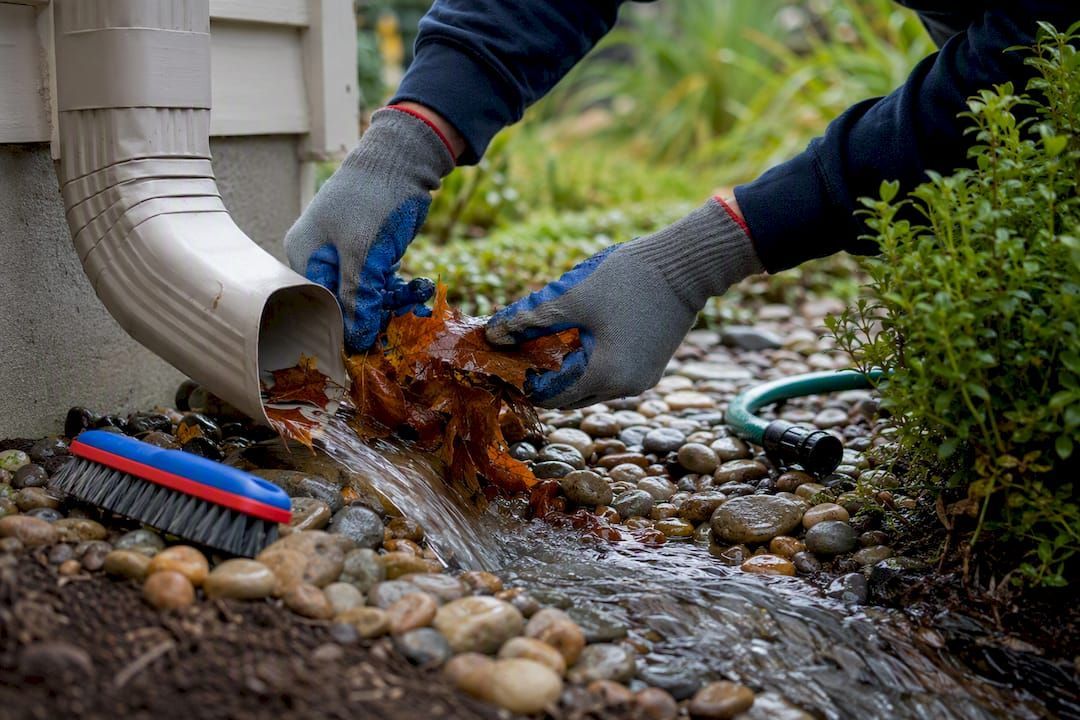
When something's not draining right, work through it in order: check the downspout entry for debris, run a hose and watch where water backs up, look for visible bellies along the trench line, and inspect every joint for separation. Adding a cleanout near the house makes this troubleshooting far easier the next time around.
A quick seasonal routine keeps small problems from becoming big ones: flush the system each spring, clear leaves and debris every fall, and check that low-lying discharge points aren't set up to freeze solid before winter. If you're finding standing water after every storm despite doing all of this, that's the point to call in a contractor for a real grade and slope assessment.
What a Roofing Contractor Actually Checks On-Site
Professional installers size drainage lines with a margin built in, favoring 4 inch pipe even on runs that might technically get by with 3 inch, because the cost difference is small and the clog resistance is worth it. Continuous slope isn't negotiable on a professional job. Crews also default to solvent-welded hub fittings on any buried run, since a glued joint won't work loose the way a clamped fitting can over years of soil movement and freeze-thaw cycles.
A proper service call includes an on-site grade review before any digging starts, a utility locate, cleanouts placed where they'll actually get used, and permanent fittings throughout instead of shortcuts that save an afternoon but cost a callback. The gutter and drainage installations are typically backed by workmanship warranties, which matter most on the underground sections nobody sees again until something goes wrong.
— Cesar
Get Your Downspout Drainage Professionally Installed
Shieldguardroofing gives Northern California homeowners something a DIY weekend project can't: 100% in-house crews who handle grading, slope, and pipe selection the same way on every job, backed by a workmanship warranty instead of a hope that the hose test holds up in a real storm.

If your current setup has bellied pipe, a clogged corrugated run, or a downspout dumping water two feet from your foundation, that's exactly the kind of job worth handing to a professional crew rather than re-digging it yourself twice. Shieldguardroofing's gutter and drainage team handles everything from adapter selection to trench grading to final discharge placement, and every install comes backed by industry-leading warranties most weekend projects simply can't match. Pair drainage work with a full roof inspection if you're not sure whether your gutters are even feeding the downspouts correctly in the first place. Request a quote today and get a grade assessment scheduled before the next storm rolls through.
Sources
For more on distance-from-foundation guidance, see Building America / DOE guidance. For pipe sizing and freeze behavior, see The Roofing Brief's guide. For broader resilience planning, see this climate resilience guide for roofs.
FAQ
How Do You Connect a Downspout to an Underground Drain Pipe?
Attach a sized adapter to the downspout outlet, then run solvent-welded solid PVC pipe from that adapter through a continuously sloped trench to a daylight, pop-up, or dry well discharge point.
What Are the Different Types of Downspout Connectors?
The main styles are offset adapters, centered (flush) adapters, and universal flexible sleeves, chosen based on wall clearance, downspout shape, and whether you need a removable joint.
What Size Pipe Should I Use for Downspout Drainage?
Four-inch smooth-wall pipe handles most residential setups, especially where multiple downspouts feed one line; 3 inch works only for a short single-spout run.
How Far Should a Downspout Drain Discharge From My House?
Surface discharge should sit at least 5 feet from the foundation, and underground piped discharge should sit at least 10 feet away, according to Building America guidance.
Can Shieldguardroofing Install a Downspout Drainage System?
Gutter and drainage system installation and repair services are available, often including in-house crews and workmanship warranties on completed work.
Recommended